Nail Design at Home 2026 Beginner Step-by-Step Gel Nail Tutorial
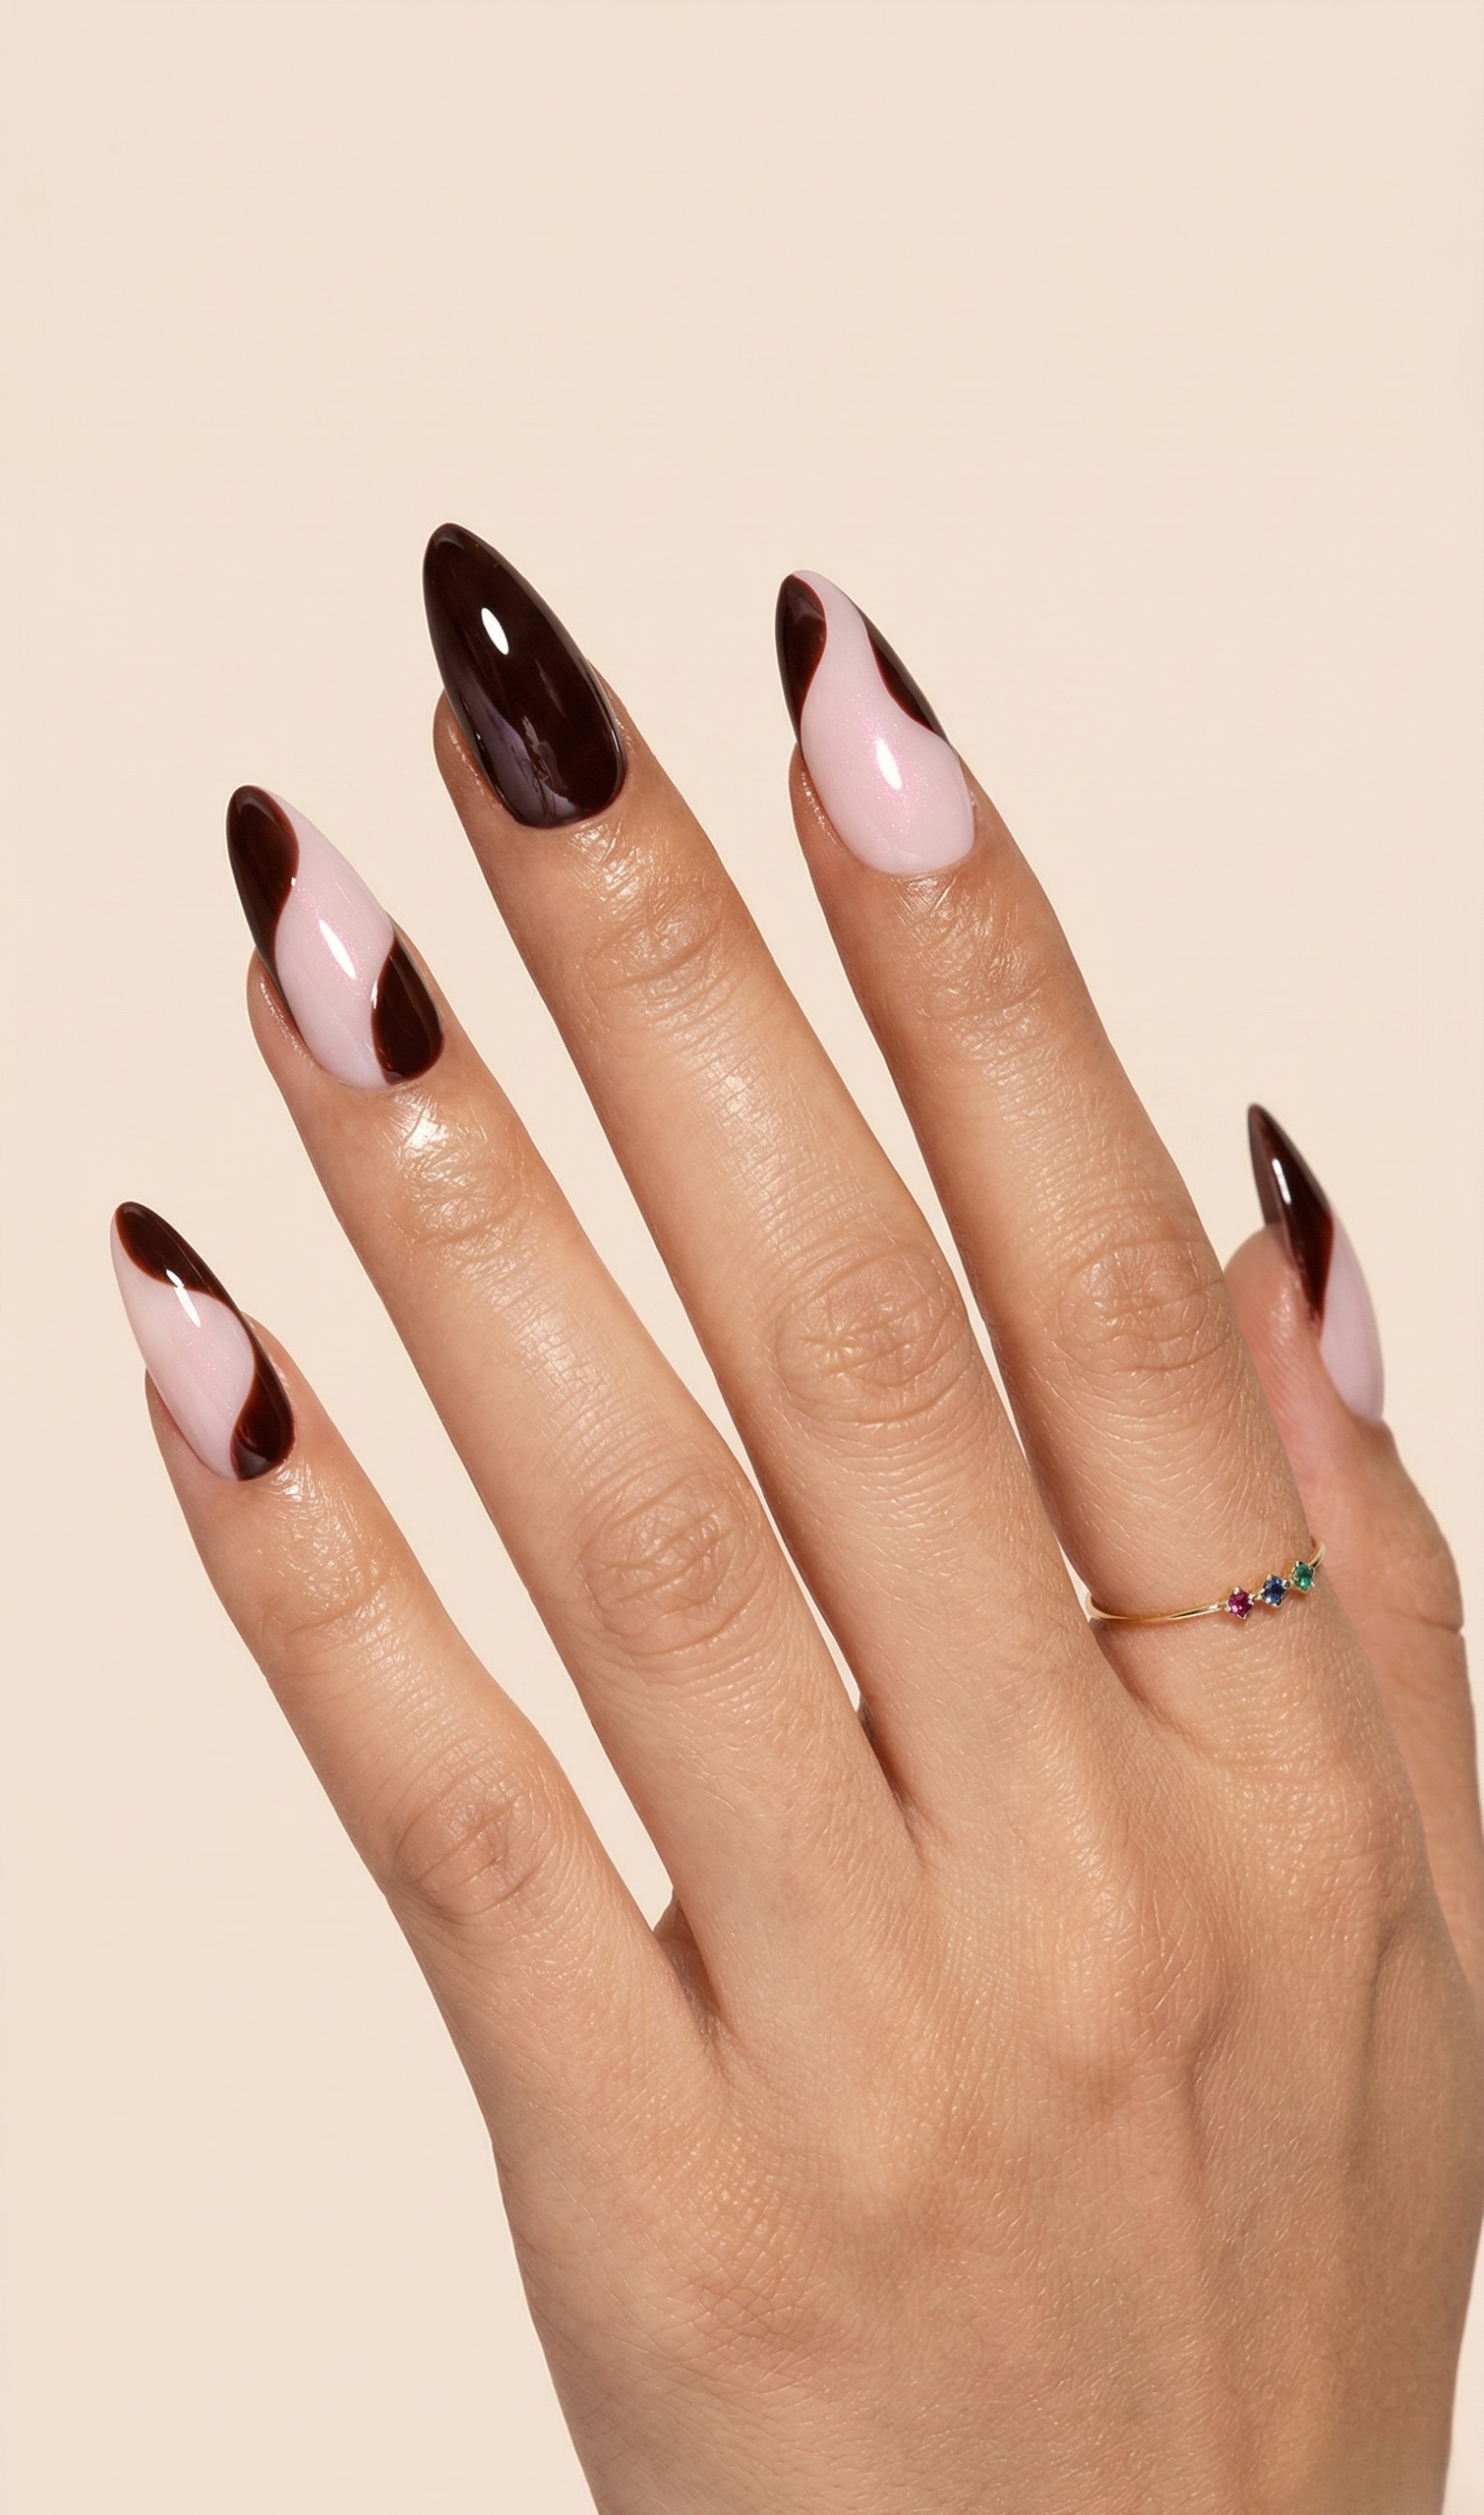
There’s a new manicure dominating our feeds this year, and it’s the absolute perfect marriage of dark romance meets the clean girl aesthetic. If you’ve been scrolling through Pinterest in 2026, you’ve definitely seen it: a sheer, glossy milky-pink base topped with moody, flowing oxblood waves.
The best part? You don’t need to spend $120 at a high-end salon to achieve this aesthetic nail ideas 2026 favorite. Today, I’m giving you the ultimate gel nail tutorial at home so you can recreate this stunning dark swirl nail design at home with professional-level results. Let’s get into it!
Obsessed with nail art?
Follow me on Pinterest as I upload new nail inspiration every single day!
What You’ll Need
To master a gel nail tutorial at home, your tools are everything. I’ve curated the exact products you need, prioritizing high-quality formulas for that pristine salon finish.
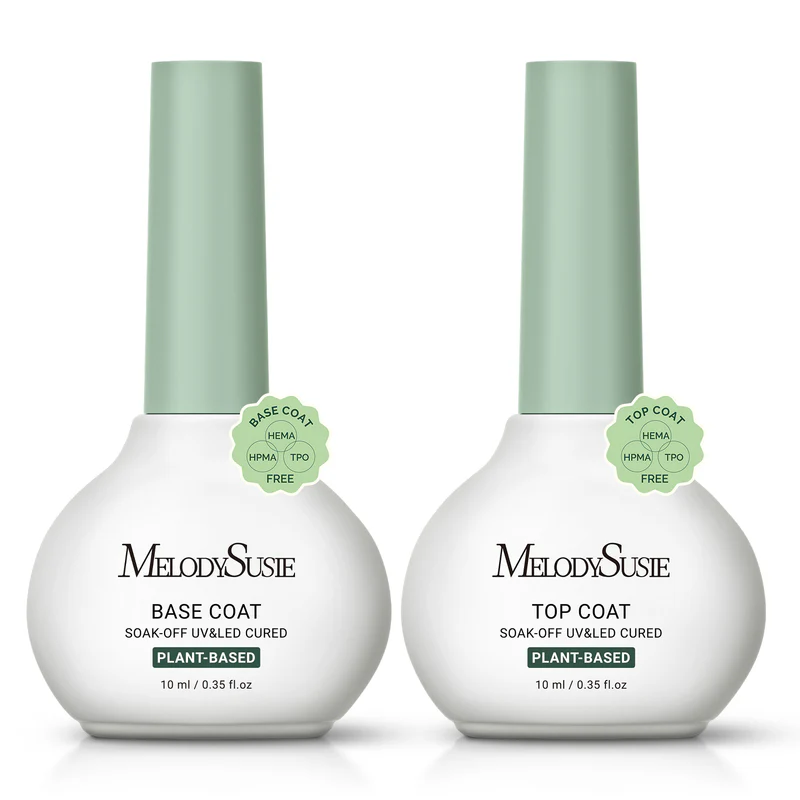
Sweet Scent Plant-Based Gel Nail Polish Set
Price: $12.99
Provides a safe, allergen-free foundation that ensures your natural nails stay strong and healthy beneath the artwork.
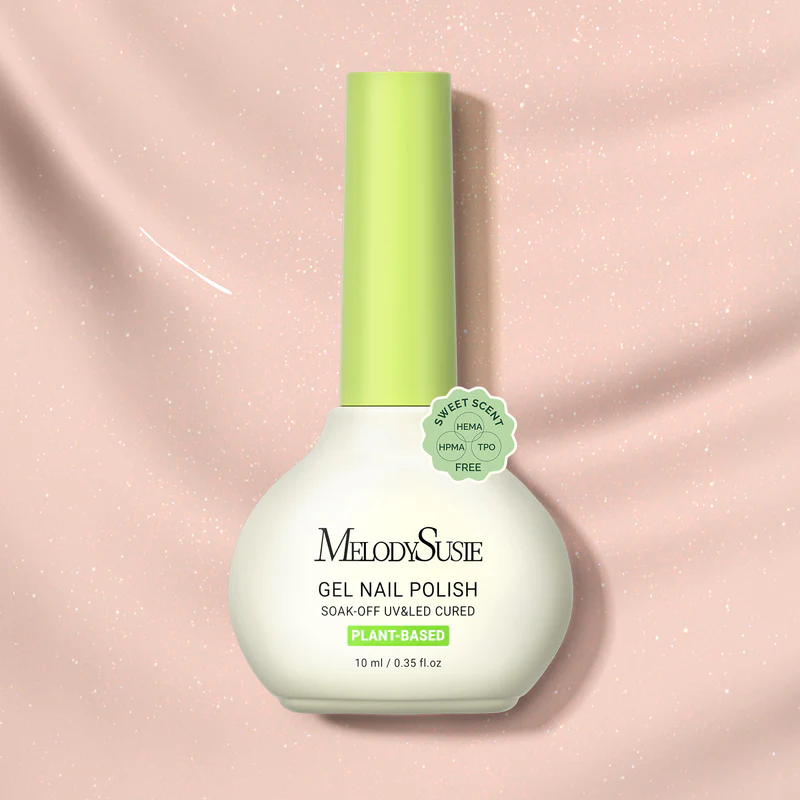
Sweet Scent Plant-Based Gel Nail Polish (shade B2607)
Price: $6.99
Gives that coveted translucent “blush nail” effect, creating a clean, glowing canvas that makes the dark swirls dramatically pop.
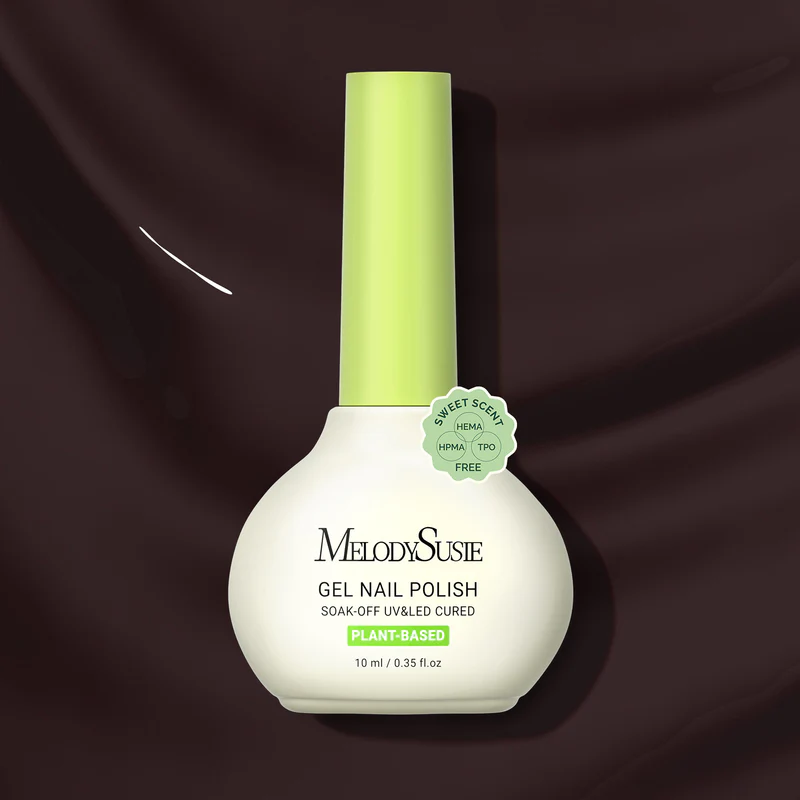
Sweet Scent Plant-Based Nail Gel Polish (shade B2201)
Price: $6.99
Its rich, vampy depth instantly transforms a basic manicure into a moody, high-fashion statement piece.

The Rest of Your Toolkit:
Essential for curing each layer of gel safely and completely.
Crucial for stripping oils from the nail surface before the base coat.
The secret to salon-quality results is flawless prep work.
Needed for cleaning up edges or wiping the tacky layer.
Creates the necessary tacky layer that anchors your color.
Provides that wet-look, glass-like final seal.
Step-by-Step Tutorial
Ready to create your masterpiece? When learning any swirl nail design tutorial, patience is your best friend. Make sure you are sitting at a well-lit desk and take your time.
Prep Work
The longevity of your dark swirl nail design at home relies entirely on this step. Begin by gently pushing back your cuticles and scraping away any invisible dead skin. Perform a thorough cuticle prep by cleaning the nail’s free edge. Lightly buff the shine off and swipe with a dehydrator to remove natural oils.
Shop it: Tweezerman Cuticle Pusher Set — $25.50
Shop Now
Base Coat Application
Apply a very thin, even layer of base coat to each nail, avoiding flooding your cuticles. Capping the free edge will prevent future lifting. Cure this layer for a full 60 seconds under your lamp. Do not touch the nails after curing; the surface is supposed to feel sticky!
Shop it: Base Coat — $6.99
Shop now
First Color Layer
Now we lay down our clean girl foundation. Apply the first coat of your base color (the gorgeous sheer pink B2607) and keep it as thin as possible. Because it’s a sheer plant-based gel nail polish, it might look slightly streaky on coat one—don’t panic. Cure for 60 seconds.
Shop it: Sweet Scent B2607 Polish — $6.99
Shop Now
Second Color Layer
Apply your second coat of B2607 to build up that milky, semi-opaque finish. This layer will level out any streaks from the first coat, giving you a flawless jelly-like canvas for your art. Cure again for 60 seconds. *Pro tip: Add a third layer if you prefer a more opaque pink.*
Line & Swirl Design
This is where the magic happens! Dip your thinnest liner brush into the oxblood color (B2201). Draw fluid swirl and wave patterns originating from different sides of the nail. Let the brush glide naturally. Flash cure for 10 seconds per nail, then do a final 60-second cure for the whole hand.
Shop it: Sweet Scent B2201 — $6.99
Shop Now
Top Coat & Finish
To lock in your oxblood nail art and smooth out the surface ridges from the painted swirls, float a generous layer of high-gloss top coat over the entire nail. Cap the free edge one last time. Cure for 60 seconds. Finish by rubbing cuticle oil into your skin!
Top Coat — $6.99
Shop Now
Pro Tips for Getting the Swirl Right
Swirl art looks effortless, but it takes a little finesse to perfect. Keep these editor-approved tips in mind:
-
Control Your Brush Pressure For thin, wispy lines, barely let the brush graze the nail. For thicker, dramatic curves, press the belly of the brush down slightly as you drag.
-
Check Your Paint Consistency Don’t glob polish onto the brush. Pull your brush through a dollop of polish on a palette while twisting it—this coats the bristles evenly and removes excess bulk.
-
The Easy Fix for Mistakes The beauty of gel is that it doesn’t dry until you cure it! If your swirl looks messy, dip a clean brush in rubbing alcohol, wipe it on a Lint-Free Wipe Shop Now , and erase the mistake before it goes under the lamp.
-
Keep It Editorial To make the design look high-fashion rather than messy, leave plenty of negative space (the sheer pink base). Don’t over-clutter the nail; 1 to 2 intersecting waves per nail is the sweet spot.
How to Customize This Look
Once you’ve mastered the technique, you can remix this aesthetic with different color palettes. Here are three trending variations for 2026:
Burgundy + Nude
Swap the sheer pink for a totally opaque, creamy nude base. Try OPI GelColor.
Shop NowBlack + White
A sharp, monochromatic moment. Try Beetles Black Gel Polish for a fresh take.
Shop NowGreen + Cream
Match a sheer ivory base with a rich, forest green. Try Modelones Emerald Green for a fresh take.
Shop NowThe ROI of DIY: Why We’re Obsessed
Wondering if investing in these finds is worth it? Let’s look at the numbers. Once you purchase your initial setup, the cost per manicure plummets in 2026.
Frequently Asked Questions
When prepped correctly using a dehydrator and avoiding the cuticle area, a DIY gel manicure with nail art can easily last 2 to 3 weeks. The key is applying thin layers and thoroughly capping the free edge with your top coat to prevent lifting and chipping.
Yes! Plant-based and HEMA-free formulas are formulated without the harsh monomers that commonly cause allergic contact dermatitis. They are significantly gentler on the nail plate while still providing excellent wear time.
You absolutely need an ultra-thin, long liner brush (often called a “striper”). Brushes between 9mm and 15mm in length allow you to hold a small bead of polish and drag it smoothly across the curve of the nail without the bristles splaying.
If you are using gel polish, a UV/LED lamp is strictly required to cure (harden) the liquid. However, you can mimic this aesthetic using regular air-dry nail polish and a top coat. Just be aware that regular polish dries quickly, so you’ll have less time to perfect your swirls before the paint gets tacky.
“I am so obsessed with how luxurious and chic this dark swirl nail design looks, and I know you’re going to rock it! Don’t forget to bookmark this page for your next self-care Sunday. If you recreate this look, please tag me on Pinterest at @itskia_v so I can hype up your masterpiece!”
XOXO, Kia
Shop The Complete 2026 Look
- Sweet Scent Plant-Based Gel Kit — $12.99 Shop Now
- Sweet Scent Polish (B2607) — $6.99 Shop Now
- Sweet Scent Polish (B2201) — $6.99 Shop Now
- Color Nail Art Brushes (6Pcs) — $15.99 Shop Now
- Aurora 4 UV/LED Lamp — $63.99 Shop Now
- Morovan Prep & Dehydrator — $6.99 Shop Now
- Tweezerman Cuticle Set — $25.50 Shop Now
- ForPro Lint-Free Wipes — $4.80 Shop Now
- Gel Base Coat — $6.99 Shop Now
- Gel Top Coat — $6.99 Shop Now